Adding Employees
Before you can schedule shifts, you need to add your employees to medishift. You can decide whether to invite them immediately via email or later.
Finding the Feature
- Go to Employees in the main menu
- Click the + Add Employee button in the top right
Creating an Employee
After clicking + Add Employee, a dialog opens with all input fields.
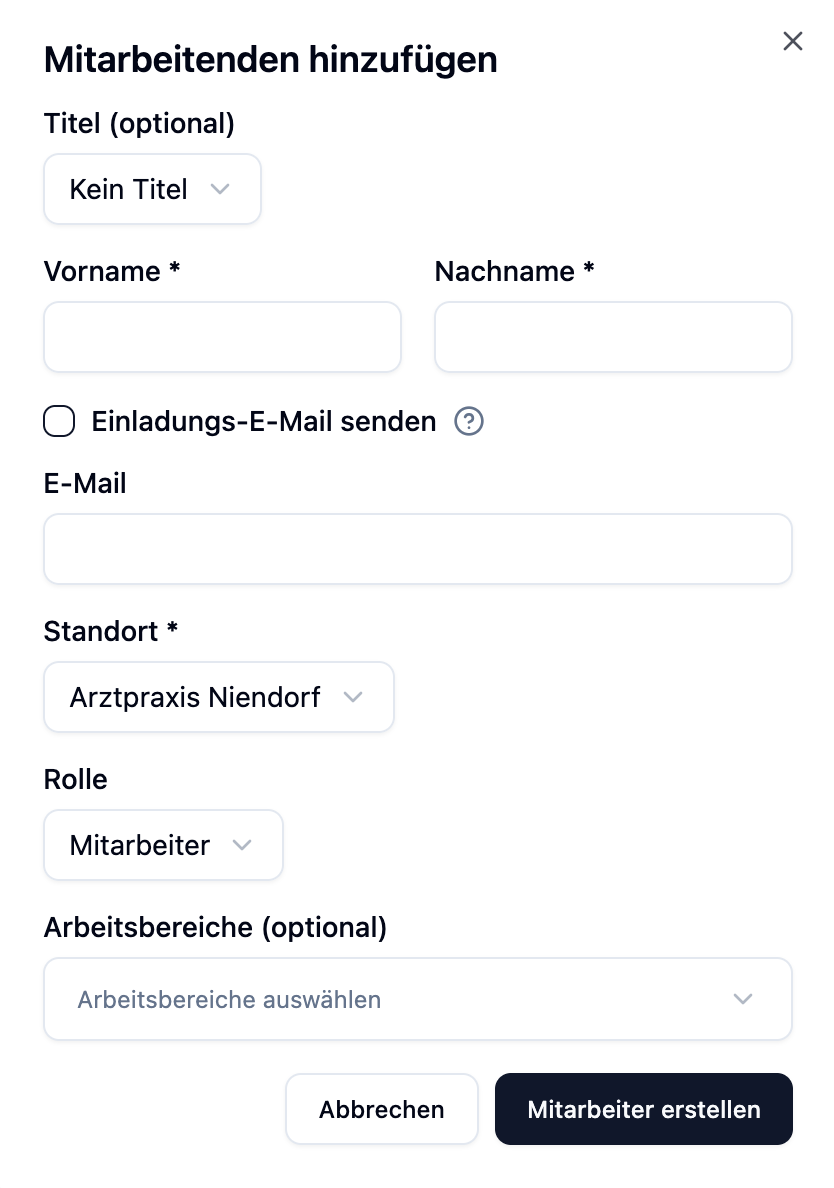
Required Fields
| Field | Description |
|---|---|
| First Name | The employee's first name |
| Last Name | The employee's last name |
| Location | The employee's home location. Fixed assignment, but they can still be scheduled in the shift plans of other locations (e.g. as a floater). |
| Role | Employee or Administrator (see Roles) |
Optional Fields
| Field | Description |
|---|---|
| Title | Academic title (Dr., Prof. Dr.) |
| Email address – required if you want to send an invitation |
Roles
When creating an employee, you select a role that determines what permissions they have.
| Role | Permissions |
|---|---|
| Employee | Can view own schedule, request absences, enter unavailabilities |
| Administrator | Can additionally manage employees, create shifts, approve absences, and change settings |
An employee's role can be changed from "Employee" to "Administrator" afterwards. Demoting from Administrator to Employee is not possible.
Inviting Employees
For an employee to log into medishift, they need to receive an invitation. You have two options:
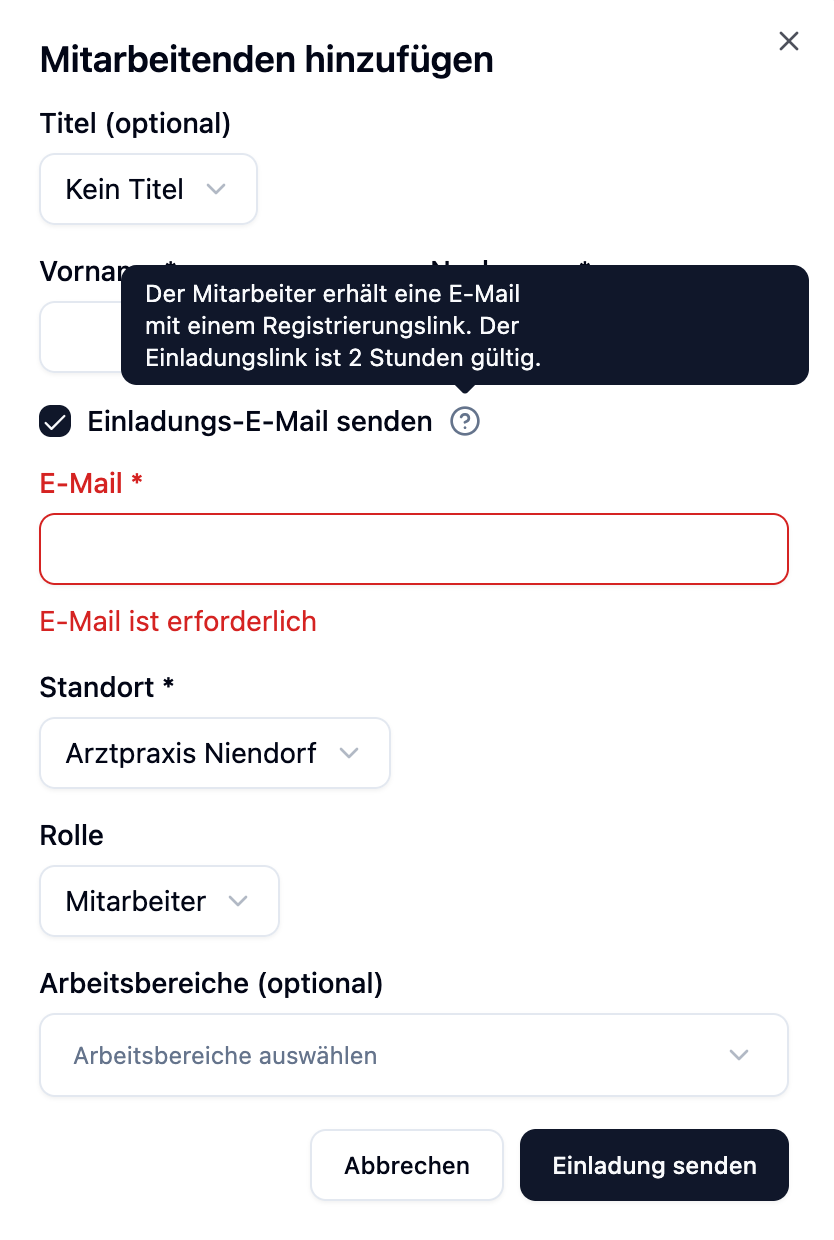
Option 1: Invite When Creating
- Fill in all fields, including email address
- Enable the checkbox Send invitation email
- Click Save
The employee receives an email with an invitation link.
Option 2: Invite Later
You can also create an employee without an invitation and send it later:
- Create the employee without enabling the checkbox
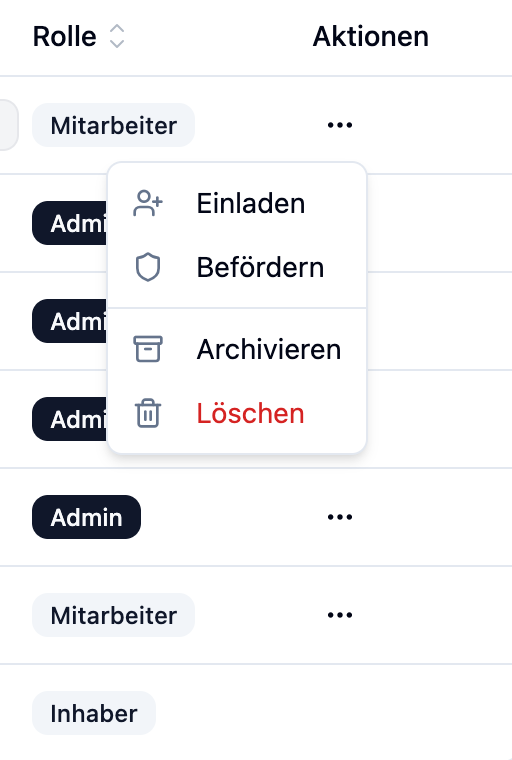
- Go to the employee overview later
- Click the ⋮ three-dot menu on the right side of the employee
- Select Invite from the dropdown menu
This option is useful when you want to add all employees and prepare the schedules first, before giving employees access.
Invitation Link
The invitation link that the employee receives via email has important properties:
| Property | Value |
|---|---|
| Validity | 24 hours |
| Usage | One-time – invalid after use |
| Resend | Possible at any time – old link becomes invalid |
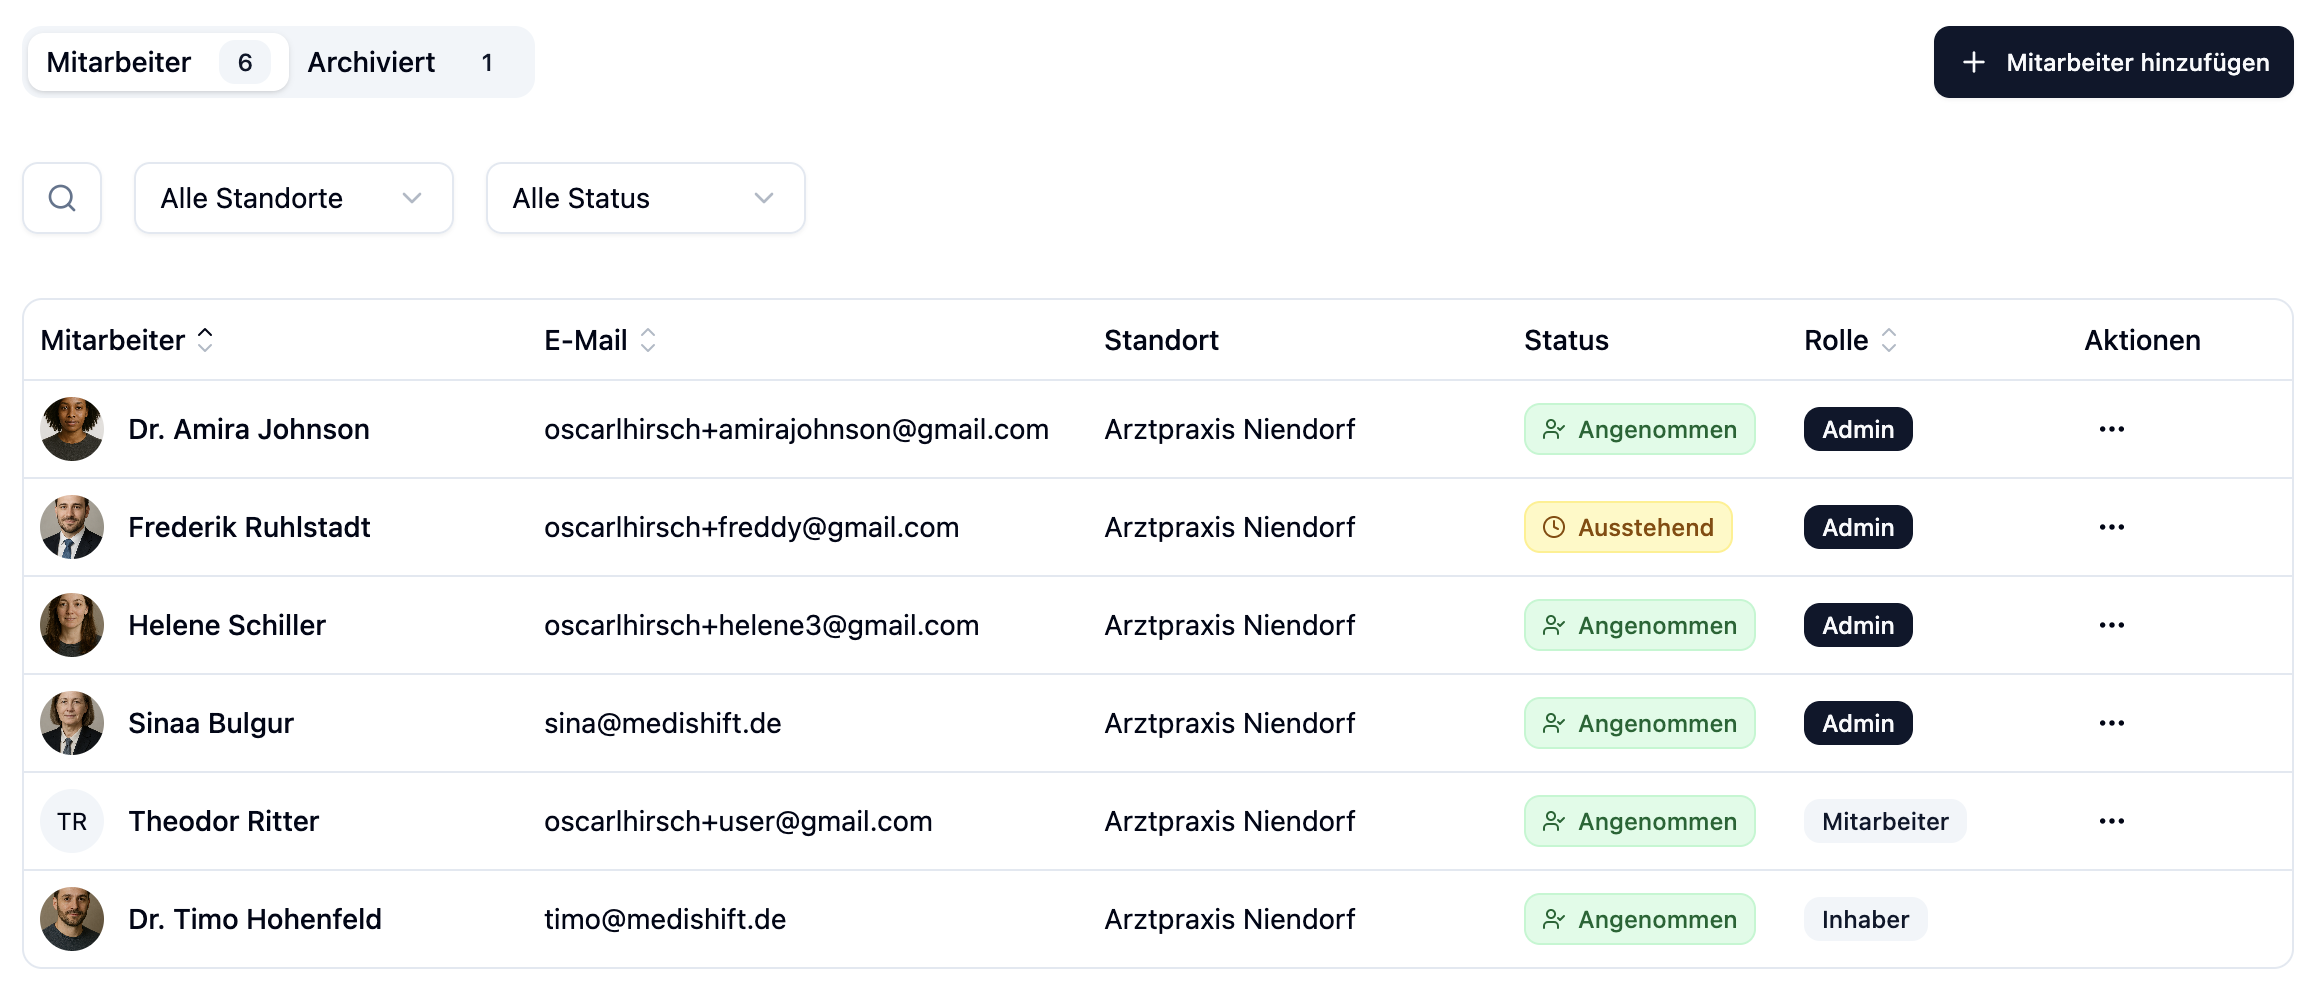
Invitation Status
In the employee overview, you can see the current invitation status:
| Status | Meaning |
|---|---|
| Not Invited | Employee was created, but no invitation sent yet |
| Pending | Invitation was sent, employee hasn't registered yet |
| Accepted | Employee accepted the invitation and can log in |
Resending an Invitation
If the invitation link has expired or the employee didn't receive the email:
- Open the employee overview
- Click the ⋮ three-dot menu on the right side of the affected employee
- Select Resend Invitation from the dropdown menu

The old link automatically becomes invalid and a new link with 2-hour validity is sent.
Inviting later and resending an invitation work through the same three-dot menu. Depending on the employee's current status, the appropriate option is displayed.
Practical Examples
Dr. Anna Schmidt is starting as a new physician on the team.
Process:
- Click + Add Employee
- Fill in:
- Title: Dr.
- First Name: Anna
- Last Name: Schmidt
- Email: anna.schmidt@practice.com
- Location: Main Practice
- Role: Employee
- Enable Send invitation email
- Click Save
Result: Anna receives an email and can register within 24 hours.
New Practice is opening – 5 employees need to be added, but they should only get access in a week.
Process:
- Add all 5 employees without invitation
- Assign them to work areas
- Create the schedules for the first week
- Send invitations to everyone the day before opening
Benefit: Planning is complete before employees have access.
Frequently Asked Questions
Can I create an employee without an email?
Yes. The email is only required if you want to send an invitation. You can create employees without an email and schedule them in the shift plan – they just won't be able to log in themselves.
What happens if the invitation link expires?
The employee can no longer register. You can send a new invitation at any time – the old link automatically becomes invalid.
Can I change the role afterwards?
You can promote an employee to Administrator. Demoting from Administrator to Employee is not possible.
How many employees can I add?
This depends on your subscription. You can see how many seats are still available in the settings under Plan.
Summary
| Aspect | Details |
|---|---|
| Required Fields | First Name, Last Name, Location, Role |
| Only required for invitation | |
| Invitation Link | Valid for 24 hours, can be resent |
| Roles | Employee (limited) or Administrator (full access) |
After you've created your employees, assign them to the appropriate areas via the work areas. This way they appear in the shift plan and you can start planning.